API Sandbox for Crypto: Test Payments Safely
What a crypto API sandbox is, how it differs from a testnet, and a step-by-step plan to test wallets, transfers and webhooks before you go live.
Reviewed by Maurice Sobiera
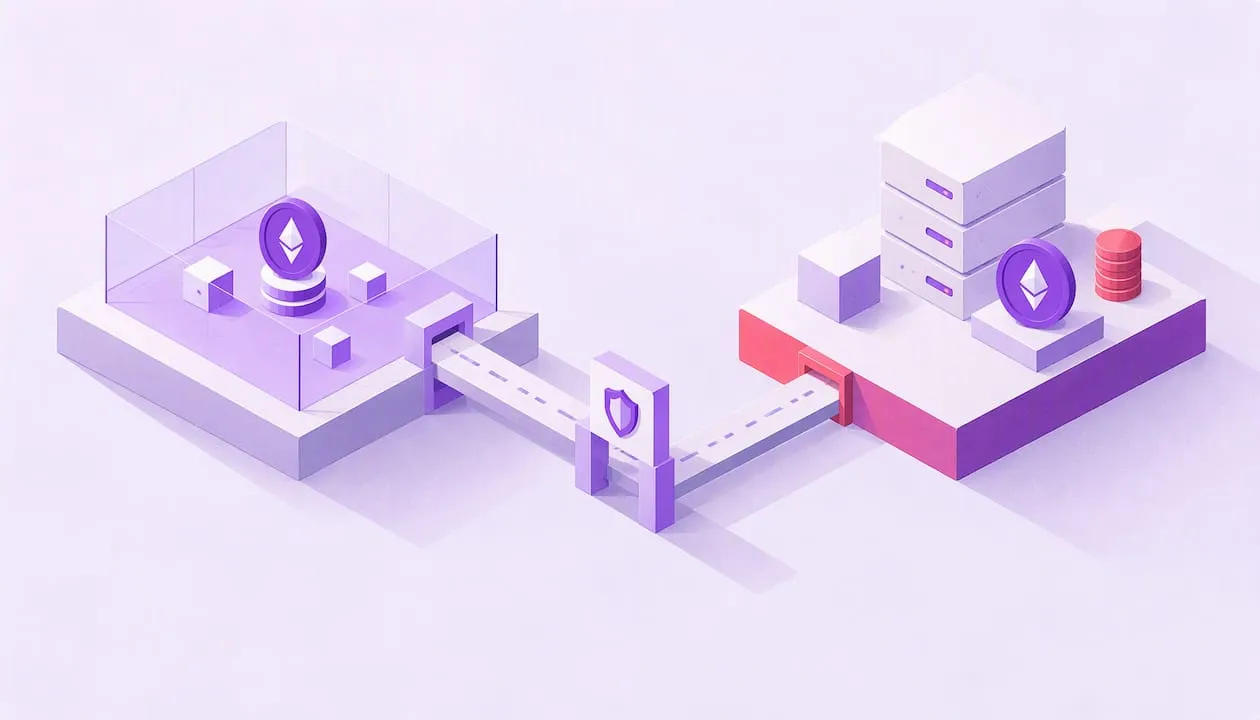
A crypto API sandbox is an isolated copy of a payment or wallet API in which you can create wallets, send transactions and receive notifications without moving real money. You switch to production by changing credentials and network settings. Providers use the word differently: some simulate balances, others point you to a public blockchain testnet.
This guide explains the difference, walks through a test plan from first key to first webhook, and lists what to verify before launch.
TL;DR
- A sandbox is a provider-run, isolated copy of an API. A testnet is a separate public blockchain with valueless coins. Many teams use both.
- Test the full loop: create a wallet, fund it, send a transaction, confirm it, receive the webhook, handle a failure.
- Webhooks are where most payment bugs hide. Test signature checks, retries, duplicates and out-of-order events.
- Never reuse production keys or wallet secrets in test code, and never let test addresses leak into production configuration.
- Before launch, compare supported networks, assets, fee behavior and confirmation timing between test and live.
What is a crypto API sandbox?
The word gets used loosely, so start with a working definition. In API design, a mock returns predefined responses. A full sandbox is different: Redocly describes it as a stateful, isolated environment that persists records, runs business logic and lets you test destructive actions without risking production data. That distinction matters for crypto. If you create a wallet and then ask for its balance, a mock gives you whatever it was told to say. A sandbox remembers the wallet you created.
A crypto sandbox usually does three things:
- Issues separate test API keys that cannot touch live funds.
- Lets you create accounts or wallets and give them test balances.
- Simulates, or relays to a testnet, the transactions and notifications you would see in production.
Sandbox vs. testnet vs. devnet
A blockchain testnet is not the same thing as an API sandbox. A testnet is a separate public network that mimics mainnet so developers can experiment without the stakes of live cryptocurrency. The Ethereum documentation describes testnets as the analog of a staging server. It names Sepolia as the recommended default testnet for application development, and it says that most people get testnet ETH for free from faucets.
Testnet coins are supposed to have no real value. Treat anyone who asks you to pay for them as a red flag.
| API sandbox | Testnet or devnet | |
|---|---|---|
| Run by | The API provider | The blockchain community or foundation |
| What it simulates | The provider’s endpoints, accounts, balances, notifications | The blockchain itself |
| Funds | Fake balances you can often top up on demand | Faucet coins with no value |
| Speed and reliability | Usually predictable | Can be slow, congested or reset |
| Best for | Integration testing of your app against the API | Testing on-chain behavior, contracts, fee logic |
The practical takeaway: a sandbox tests your integration with the API, while a testnet tests how your code behaves on a real (if worthless) chain. Each chain documents its own test networks: Tron has Shasta and Nile, and the Bitcoin developer guide explains testnet and regtest modes.
How do you test a crypto payment, step by step?
Providers differ in details, but the sequence below holds up almost everywhere.
1. Get test credentials
Create an account and look for a separate test or sandbox mode, or a separate base URL. Good providers issue distinct keys per environment so a test key simply fails against production. Store the key in an environment variable or secrets manager from the first line of code, not in the repository.
If the provider uses signed requests, as HMAC-based APIs do, implement the signing function once and write a unit test for it with a known input and output. A misplaced newline in the string you sign produces errors that look like authentication failures for hours.
2. Create a wallet
Call the wallet-creation endpoint and record what comes back: the address, an identifier, and whether the provider holds the private key or hands it to you. That last point decides your security model, so write it down. Create several wallets on each network you plan to support, because address formats differ between chains and are a common source of validation bugs.
3. Fund it with test assets
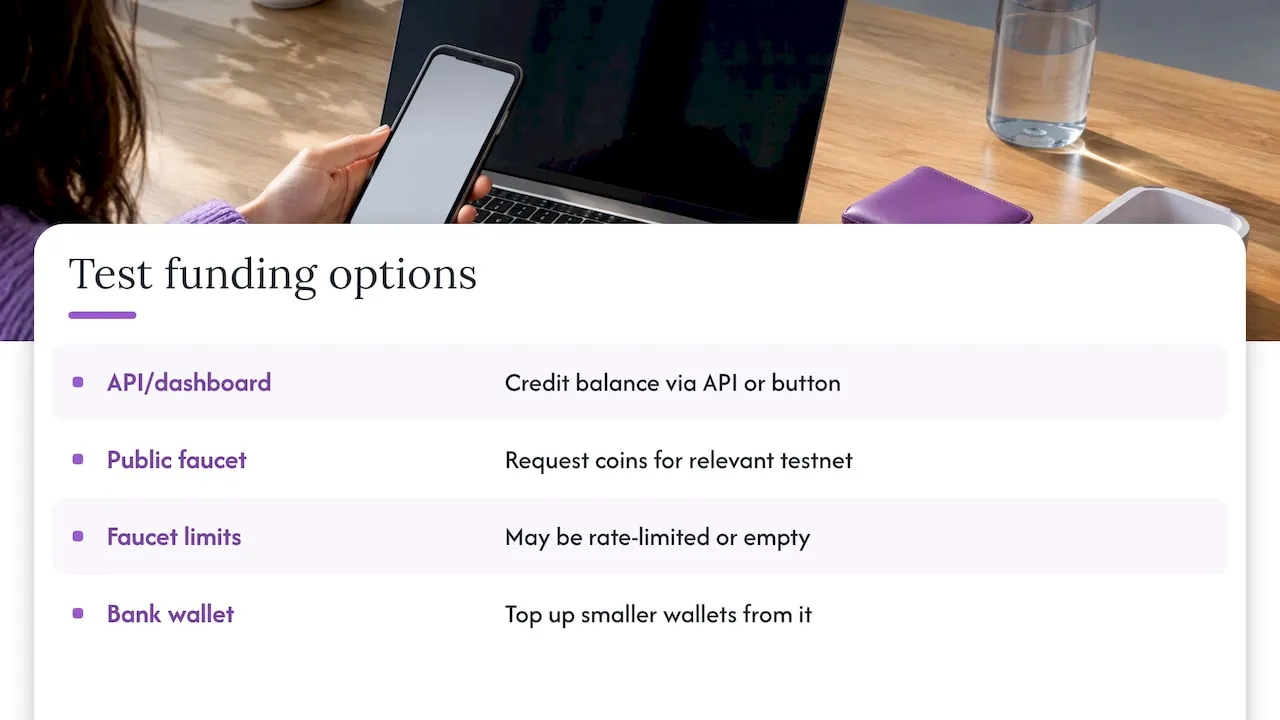
This is where sandboxes diverge most. Some let you credit a balance through an API call or dashboard button. Others expect you to request coins from a public faucet for the relevant testnet and send them to your new address. Faucets can be rate-limited or empty, so request funds early in the day, not ten minutes before a demo. Keep one well-funded test wallet as your “bank” and top up smaller wallets from it.
4. Send a transaction
Start with the simplest case: a native-coin transfer between two of your own wallets. Then move to token transfers (ERC-20, BEP-20 or TRC-20 style tokens), because tokens add contract calls, different fee mechanics and, on some chains, a separate fee currency. Record the transaction ID the API returns and compare it with what a block explorer for that test network shows.
5. Verify the result
A transaction has several states, and your app should model them rather than a single “paid” flag:
- Submitted: accepted by the API, not yet on the chain.
- Pending: seen in the mempool or in a block with too few confirmations.
- Confirmed: enough confirmations for your risk tolerance.
- Failed or dropped: rejected, out of gas, replaced or never mined.
For revenue reporting, count settled payments, not attempts. The same applies to confirmations on a chain: a transaction that is pending is not revenue yet.
How do you test webhooks and failure paths?
Webhooks turn a payment API from something you poll into something that tells you when money arrives. They are also where integrations most often break, because the sender controls the timing.
Receive a notification end to end
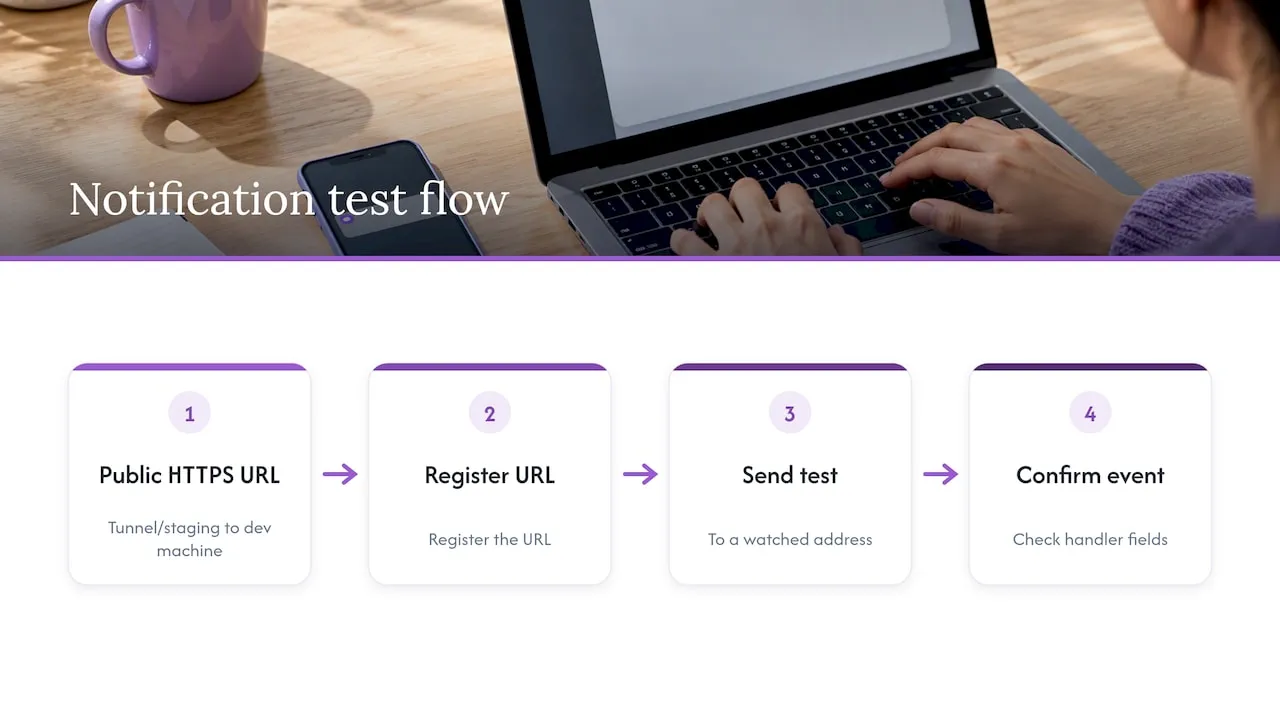
You need a public HTTPS URL that reaches your development machine. A tunneling tool or a staging server works. Register the URL, send a test transaction to a watched address, and confirm that your handler receives the event with the fields you expect. Our article on using webhooks to process deposits automatically covers the usual structure.
A webhook test checklist
- Verify the signature. Reject any request whose signature does not match, and test it by tampering with the signed value. With Chaingateway, the signed value is the
txid, so also check amount and recipient against your expectations. The personal secrets article explains this. - Test idempotency. Deliver the same event twice. Your system must credit the user once, so store an event or transaction ID and check it before acting.
- Test out-of-order delivery. A “confirmed” event can arrive before “pending”. Do not let an older state overwrite a newer one.
- Test a slow or failing receiver. Return an error or hang for 30 seconds and see what the provider does. Chaingateway does not retry automatically: failed notifications are listed, and you ask for each to be sent again.
- Acknowledge fast. Respond quickly with a success code and do the heavy work in a queue. Long handlers cause timeouts and duplicate deliveries.
- Replay after downtime. Turn your receiver off, send transactions, turn it back on. Know how you will recover missed events, for instance from the failed-notification list or from transaction history.
Failure cases worth forcing
Deliberately break things in the sandbox, since that is what it is for:
- Send more than the wallet balance.
- Send to a malformed address or an address for the wrong network.
- Send a token to a wallet that has no native coin for fees.
- Set a fee too low and watch the transaction stall.
- Send a tiny amount below your minimum-payment threshold.
- Pay slightly less or more than an invoice expects. Underpayments and overpayments are routine in crypto checkout, so decide your policy and test it.
What differs between sandbox and production?
A sandbox is a model, and models leave things out. Before you switch to live keys, check these areas explicitly.
| Area | What to check |
|---|---|
| Confirmation timing | Testnet blocks can be faster, slower or irregular compared with mainnet. Re-measure on live chains with small amounts. |
| Fees | Test networks often have trivial or fixed fees. Confirm how the API estimates fees on mainnet and what happens when the network is congested. |
| Supported assets | The tokens available in test mode may be a subset of live ones, or vice versa. Confirm each asset you list in your product. |
| Rate limits | Limits can differ per environment and per plan. Load-test within the limits you will actually have. |
| Data shape | Check that field names, decimal precision and amount units (smallest unit vs. whole coins) match between environments. |
| Webhook delivery | Production volume brings retries, bursts and larger payloads. Re-run your idempotency tests with real traffic. |
| Compliance and limits | Some providers relax verification in test mode. Find out what applies when you go live. |
Then run a canary payment on production: a small real transfer through the whole flow, from wallet creation to webhook to ledger entry. It costs a few cents or dollars and catches configuration mistakes that no sandbox can.
How do you protect keys while testing?
Test environments are where bad habits start, and habits travel into production.
- Use separate keys per environment. Name them clearly and give them different prefixes in your secrets manager so a mix-up is visible.
- Keep secrets out of the repo. Use environment variables, a vault or your CI’s secret store. Scan commit history if a key ever slips in, and rotate it.
- Never import a real wallet into a test setup. If a seed phrase or private key controls real funds, it does not belong in a test script, a screenshot or a chat message.
- Restrict who can see keys. Contractors and agencies working on your integration should get test keys only.
- Pin base URLs in configuration, not in code. Add a startup check that refuses to run if a test key is paired with the live URL or the reverse.
- Rotate after demos. Keys that were shared on screen or in a recording should be treated as exposed.
What limitations should you check up front?
Before you commit to a provider’s sandbox, ask a few blunt questions:
- Which networks does it cover in test mode? If your product needs Ethereum, Tron and Bitcoin, confirm all three, not just one.
- Which token standards and assets? Native coins are easy. Stablecoins and NFTs are where gaps appear.
- How do you get test funds, and are there caps? Faucet limits and daily maximums shape how fast your team can iterate.
- Does it persist state? A stateful sandbox lets you build multi-step scenarios. A stateless mock does not.
- Are webhooks available in test mode, and can you trigger them on demand?
- How stable is it? Testnets get reset or deprecated, which can wipe your test wallets. Keep setup scripted so you can rebuild in minutes.
If you also need to understand which kinds of provider fit which job, our comparison of blockchain APIs and when to use each type is a good companion.
How do you test with Chaingateway?
Chaingateway does not offer a separate simulated sandbox with fake balances. Its API documentation describes testing on public testnets: add the header X-Network: testnet to a request, or leave it out for mainnet. The same endpoints, keys and response shapes apply to both. Each chain has its own testnet, listed on the supported networks page:
| Chain | Testnet |
|---|---|
| Ethereum | Sepolia |
| Tron | Nile |
| BNB Smart Chain | BSC testnet |
| Polygon | Amoy |
| Arbitrum | Arbitrum Sepolia |
| Bitcoin | Testnet3 |
| Solana | Devnet |
A first test takes four requests. Create an address, fund it from the chain’s faucet, register a webhook, and send a transfer:
# 1. Create an address on Sepoliacurl -X POST https://app.chaingateway.io/api/v2/ethereum/addresses \  -H "Authorization: Bearer $CHAINGATEWAY_TOKEN" \  -H "X-Network: testnet" \  -H "Content-Type: application/json" \  -d '{"password": "use-a-strong-test-password"}'
# 2. Fund the address from a Sepolia faucet, then register a webhook for itcurl -X POST https://app.chaingateway.io/api/v2/ethereum/webhooks \  -H "Authorization: Bearer $CHAINGATEWAY_TOKEN" \  -H "X-Network: testnet" \  -H "Content-Type: application/json" \  -d '{"to": "0xYourNewAddress", "url": "https://your-tunnel.example/hooks", "type": "ETH", "reference": "test-1"}'
The response of the first call contains the new address. For the webhook, type names the asset kind. On Ethereum the values are ETH, ERC20 and ERC721, and other chains use their own names, such as TRC20 on Tron. The API reference lists them. Webhooks exist on every supported chain except Solana, so test Solana by polling transactions instead.
Chaingateway signs webhooks with an X-Signature header once you set a personal secret, and it does not retry failed notifications by itself. Both are worth testing on testnet. Plans start at €49 per month for Plus, with Pro at €99, Premium at €249 and Enterprise at €499 per month. Annual billing is €490, €990, €2,490 and €4,990 respectively. Every plan starts with a 7-day free trial without a card or KYC. See the pricing page, the Blockchain API and Chaingateway Webhooks pages for details.
For ideas on what to build once your tests pass, our overview of blockchain API use cases is a good next read.
What does a practical test plan look like?
Use this as a one-page checklist for a release.
- Setup: test keys stored in a secrets manager, base URL in config, signing function unit-tested.
- Wallets: create at least two per supported network, record address formats.
- Funding: fund one master test wallet, script the top-up of the others.
- Happy path: native transfer, then token transfer, each verified against a block explorer.
- Webhooks: signature check, duplicate delivery, out-of-order events, receiver downtime.
- Failures: insufficient balance, wrong network address, missing fee currency, low fee, underpayment, overpayment.
- State model: your database handles submitted, pending, confirmed and failed without ambiguity.
- Load: burst of transactions within your plan’s rate limits.
- Security review: no production secrets in test code, logs scrubbed of keys and seeds.
- Canary: one small live payment through the full flow before announcing launch.
Sources
- Networks, Ethereum developer documentation (testnets and faucets)
- Networks, Tron developer documentation (Shasta and Nile)
- Testing applications, Bitcoin developer guide
- What you really need to build an API sandbox, Redocly
Recommended
Frequently asked questions
No. A sandbox is an isolated environment run by the API provider, with its own keys and test balances. A testnet is a separate public blockchain whose coins carry no value. Some sandboxes are built on testnets, and some are fully simulated, so check which one you are getting.
Yes. Use a provider’s sandbox or a public testnet with faucet coins. Both let you create wallets, send transfers and trigger notifications at no cost. Finish with a very small live transaction, because production fees and timing can differ from test conditions.
Expose your local server through a tunneling tool or deploy a staging endpoint with HTTPS, then register that URL for notifications. Send a test transaction to a watched address and confirm your handler receives, verifies and processes the event. Repeat with duplicate and delayed deliveries.
Swap in live keys and base URLs through configuration, then verify supported networks and assets, fee estimation, confirmation counts and rate limits. Re-run your webhook idempotency tests and send a canary payment to confirm the full flow works with real funds.
Ready to build this yourself? Get your API key — 7-day trial, no card required — or see the Blockchain API for the full endpoint reference.