TRON Payments Integration: A Developer's Guide for 2026
How to integrate TRON payments: build and sign transactions, detect TRX and USDT-TRC20 deposits, handle fees and confirmations, and cut the infrastructure work.
Reviewed by Maurice Sobiera

A TRON payments integration is the set of components that lets your application accept and send TRX and TRC-20 tokens such as USDT: addresses, signed transactions, deposit detection and confirmation checks. You can build it on TRON’s node APIs, or call a REST API that creates wallets, sends transfers and pushes webhooks. This guide covers both paths.
TL;DR
- TRX payments are native account-to-account transfers. TRC-20 payments (such as USDT) are smart-contract calls, so they consume Energy as well as Bandwidth.
- Every state-changing operation follows three steps: build an unsigned transaction, sign it with the sender’s key, broadcast it to a node.
- Credit deposits only from solidified blocks, only for successful transactions, and for TRC-20 only from token contracts you approved.
- Fees depend on staked or delegated resources. Plan for them before launch, or TRX gets burned on every transfer.
- You can skip running nodes and block parsers by using a wallet, transfer and webhook API such as Chaingateway’s. Its webhooks are not retried automatically, so plan to reconcile.
Table of Contents
- How do TRON payments work?
- Should I build on node APIs or use an API?
- How do I build, sign and broadcast a transaction?
- How do I detect incoming payments?
- When is a TRON payment final?
- How do I protect wallets and private keys?
- What do Energy and Bandwidth cost?
- How do I handle failed, delayed and duplicate payments?
- Can I accept payments in my own token?
- How do I send TRON payments through Chaingateway?
- FAQ
- Sources
How do TRON payments work?
TRX is TRON’s native token. It pays network fees, and staking it provides network resources and voting rights, according to the TRON developer documentation on TRX. Most commercial payment volume on TRON, though, is in tokens such as USDT-TRC20, so you need to understand both transfer types.
A TRX payment is a plain account-to-account transfer on the chain. A TRC-20 payment is different: the sender calls the token contract’s transfer function, which updates balances inside the contract and emits a Transfer event. Both end up recorded on TRON, but TRC-20 transfers need smart-contract execution, so they consume Bandwidth and Energy, as described in the TRON white paper.
This difference shapes your whole integration:
| TRX transfer | TRC-20 transfer (e.g. USDT) | |
|---|---|---|
| What it is | Native transfer between accounts | Call to a token contract |
| Resources used | Bandwidth | Bandwidth and Energy |
| How you detect it | Transaction history, internal transactions | Transfer event logs from the contract |
| What you must verify | Success, recipient, amount | Success, approved contract, sender, recipient, amount |
Should I build on node APIs or use an API?
TRON’s integration documentation lists what a typical integration involves: connecting end-user wallets, building and signing transactions, monitoring deposits and withdrawals, and using either TronGrid or a self-hosted full node. Exchange and custodial wallet operators handle deposit monitoring, withdrawals and balance and history queries on the same foundation.
That gives you two realistic paths.
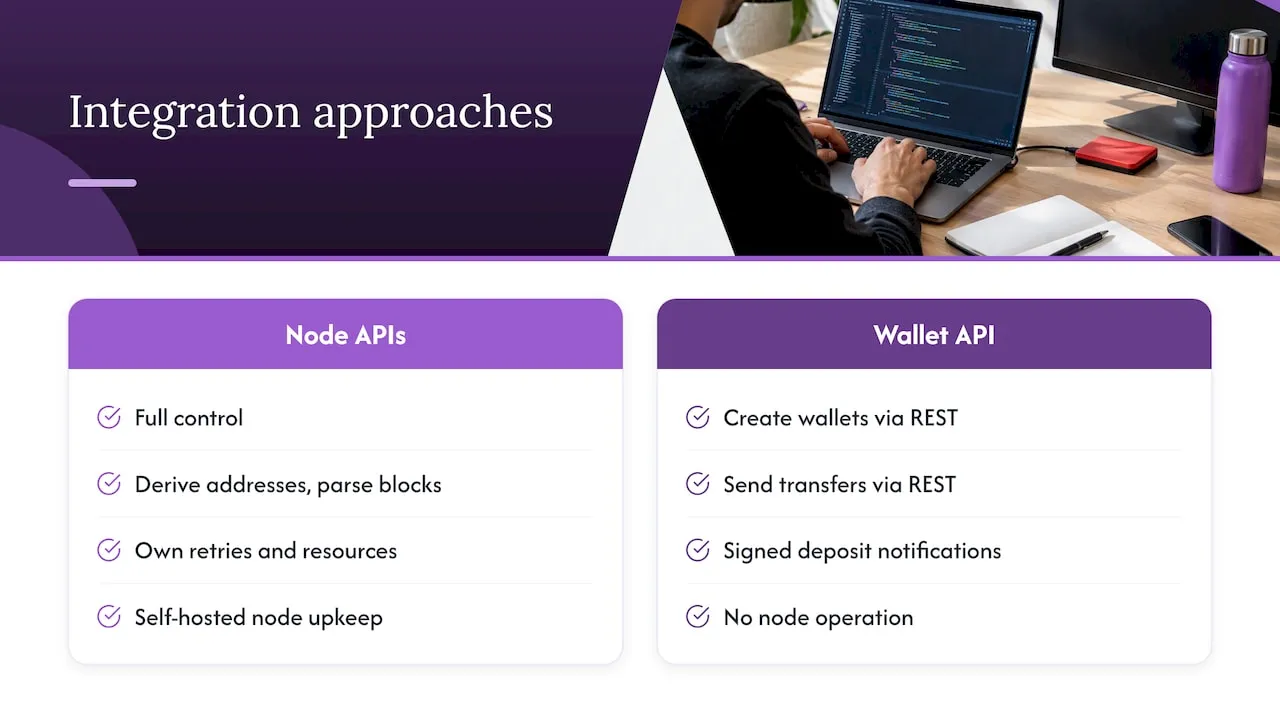
Path one: build on the node APIs. You get full control. You also own address derivation, block parsing, retry logic, resource management and, if you self-host, node upkeep. Our TRON node setup guide covers the Lite FullNode route with a jar or Docker if you go that way.
Path two: use a wallet and webhook API. You call a REST endpoint to create a wallet, another to send a transfer, and you receive a signed webhook when a deposit arrives. Our TRON API is built for this: USDT-TRC20 transfers and deposit webhooks without operating nodes. The endpoints are in the OpenAPI definition.
A useful rule of thumb: if payments are your product’s core differentiator and you have a team to run infrastructure, build. If payments are a feature of something else, an API gets you to production faster and keeps your engineers on your actual product.
How do I build, sign and broadcast a transaction?
Whether you use raw node calls or an SDK, every state-changing TRON operation follows the same three-step workflow: construct an unsigned transaction through a node API, sign it client-side with the sender’s private key, then broadcast the signed transaction to a node.
Two details are worth knowing:
- TAPOS. Each transaction references a recent block, which limits replay on chain branches that do not contain that block, per the protocol documentation on transactions. In practice, build and sign close to the time you broadcast. A transaction signed and parked for a long time may expire.
- Use SDK helpers for signing. The wallet developer guide recommends SDK helpers in production rather than hand-rolled signing primitives, to avoid edge cases around protobuf serialization and signature recovery. Do not write your own.
For browser-based flows where the user pays from their own wallet, the DApp integration guide describes two options: TronWallet Adapter for unified multi-wallet support, or direct TronLink integration, which injects a provider at window.tron. Merchant checkouts that generate a deposit address per order usually do not need this at all. The customer pays from whatever wallet they already use.
How do I detect incoming payments?
The typical merchant model is one deposit address per order or per customer. Your job is then to notice money arriving at those addresses.
The exchange and custodial wallet guide describes two detection methods: polling TronGrid account-history APIs every few seconds, or parsing blocks sequentially. If you parse blocks, use the latest solidified height, and retrieve event logs and internal transactions separately from execution results, parsing them as distinct records.
Do not miss internal transactions
This is the most common gap in homegrown integrations. Users can receive TRX or TRC-10 tokens through a smart-contract call, and those transfers do not appear as top-level transactions. The same guide says to parse internal transactions when crediting deposits. If your listener only watches top-level transfers, some customers will pay and never be credited.
Verify TRC-20 deposits properly
For token deposits, a transaction hash alone proves nothing. The exchange wallet integration guide says to verify that the transaction succeeded and to parse Transfer logs only from approved token contracts, validating sender, recipient and amount. Never credit failed transactions. After a TRC-20 transaction is solidified, the TRC-20 interaction guide says to confirm execution with getTransactionInfoById and, for transfer and transferFrom, also verify the Transfer event the token contract emitted.
A minimal verification checklist for each TRC-20 deposit:
- The contract address is on your allowlist (the real USDT contract, not a look-alike token with the same name).
- The transaction result is a success.
- A Transfer event exists with your deposit address as recipient.
- The amount matches the order, using the token’s decimals correctly.
- You have not already credited this transaction ID.
The allowlist step matters more than it looks. Anyone can deploy a token called “USDT”. Your code has to check the contract, not the symbol.
When is a TRON payment final?
A TRON transaction passes through four phases: create and sign, broadcast and validate, inclusion in a block by a Super Representative, and solidification. According to the protocol documentation, it is fully confirmed when at least 19 distinct active Super Representatives have produced blocks at or beyond its block, which typically takes about one minute.
For your payment logic, that means:
- Read from the solidified block height, not the chain head, so a fork rollback cannot reverse a payment you already credited. The exchange integration guide states solidification is about one minute behind the head.
- Show the customer a “payment seen” state early, and a “payment confirmed” state only at solidification. This keeps checkout feeling instant without risking a reversal.
- Make crediting idempotent. Keyed on transaction ID and log index, a retried webhook or a re-parsed block cannot double-credit an order.
How do I protect wallets and private keys?
The same exchange guide gives clear direction on keys. Use BIP-44-compliant derivation for deposit addresses, and perform withdrawal signing offline, in an HSM or on a hardware wallet, never with a key stored in plaintext on an application server.
In practice:
- Derive deposit addresses from one protected seed, so you never have thousands of independent keys to back up.
- Keep the signing environment separate from the web-facing application.
- Log every withdrawal request with who approved it. Require limits and approval for large amounts.
With Chaingateway, POST /api/v2/tron/addresses creates a wallet. If you send a password, the private key is stored encrypted with it, and you pass the password instead of the key when you send. Chaingateway does not store the password and cannot restore a wallet if you lose it. Read more in our guide to TRON password-protected wallets.
What do Energy and Bandwidth cost?
Fees are where TRON surprises new teams. Per the exchange integration guide, withdrawals consume Bandwidth, while TRC-20 transfers and other contract calls also consume Energy. Resources come from staking or delegation, and when they run short, TRX gets burned instead. Staking is recommended for high-volume operators, and fee_limit caps the Energy budget on the caller side for smart-contract calls.
The numbers to keep in mind, from TRON’s tokenomics documentation:
- Burn rate: 0.001 TRX per Bandwidth byte and 0.0001 TRX per Energy unit. These rates can be changed through proposals, so read them from the chain rather than hard-coding them.
- Staking TRX provides Bandwidth or Energy and produces TRON Power for voting. Unstaking begins a waiting period set by the
getUnfreezeDelayDayschain parameter.
Every activated account also gets a renewable allowance of 600 free Bandwidth that replenishes gradually over 24 hours after use, and TRX is burned as a fallback when Bandwidth or Energy is insufficient, according to the TRON vs Ethereum comparison.
Planning your fee budget
Before launch, estimate your monthly transfer count and the resources each one needs, then decide how much to stake or delegate versus burn. Our TRON Energy and Bandwidth calculator and the USDT-TRC20 fee calculator help with the arithmetic. Our guide to Energy versus Bandwidth explains which resource each action draws on, and the article on reducing TRC-20 transaction fees covers ways to lower what you spend.
Chaingateway has endpoints for staking and delegation: POST /api/v2/tron/freeze and POST /api/v2/tron/delegate. The older Paymaster fee service is deprecated. Use TronFuel if you want fees sponsored for your users. GET /api/v2/tron/chainparameters returns the current Energy and Bandwidth prices.
One practical habit: always set a sensible fee_limit on contract calls, and check an account’s available resources before sending, so a withdrawal does not quietly burn more TRX than you budgeted.
How do I handle failed, delayed and duplicate payments?
Production payment systems earn their keep in the edge cases. Here is how to handle each on TRON.
| Situation | What to do |
|---|---|
| Transaction broadcast but never appears | Check whether it expired (TAPOS reference too old). Rebuild, re-sign and rebroadcast with a fresh reference. |
| Transaction included but failed | Do not credit. Record the failure result and, for withdrawals, check Energy and fee_limit. |
| Same webhook delivered twice | Dedupe on transaction ID and log index before crediting. |
| Webhook never arrived | Chaingateway does not retry automatically. List GET /api/v2/tron/webhooks/notifications/failed and re-send with POST /api/v2/tron/webhooks/notifications/{id}/retry. |
| Deposit seen, then block reorganized | Only credit from solidified blocks so this cannot happen to a credited payment. |
| Customer sends the wrong token | Ignore tokens outside your allowlist and offer a manual recovery process. |
| Customer underpays or overpays | Compare received amount to the order, then apply your own partial and excess payment policy. |
For testing, run the full flow on a test network first: create an address, fund it, send a TRX and a TRC-20 transfer, and watch each state your system goes through. Then deliberately trigger failures, such as an out-of-Energy contract call and a replayed webhook, and confirm your system behaves as the table above says.
Can I accept payments in my own token?
If you issue a token on TRON, you can accept it like any other TRC-20. TRC-20 is the TRON standard for fungible tokens implemented by smart contracts. Its required interface includes balanceOf, transfer, transferFrom, approve, allowance, and the Transfer and Approval events. Because those functions and events are common, wallets and exchanges can interact with your token without special code.
For payment acceptance that means three things: add your contract address to your deposit allowlist, make sure your decimals are handled correctly in amount checks, and test with small transfers before opening it to customers. Your token behaves like USDT as far as detection goes: a Transfer event on an approved contract.
How do I send TRON payments through Chaingateway?
Create a wallet, send a TRC-20 transfer and subscribe to deposits with three kinds of request. The TRC-20 endpoint requires from, to, contractaddress and amount, plus password or privatekey.
curl -X POST https://app.chaingateway.io/api/v2/tron/transactions/trc20 \ -H "Authorization: Bearer $CHAINGATEWAY_TOKEN" \ -H "X-Network: testnet" \ -H "Content-Type: application/json" \ -d '{"from": "T...", "to": "T...", "contractaddress": "T...", "amount": 10, "password": "wallet-password"}'X-Network: testnet uses the Nile testnet. Create a webhook for a receiving address with POST /api/v2/tron/webhooks, and verify each delivery with the X-Signature header (signature guide). The webhook payload contains txid, from, to, amount, contractaddress, blocknumber and type. Start with the Blockchain API and the webhook notifications. Plans start at €49 per month, with a 7-day free trial that needs no card (pricing).
Sources
- TRX, the native token of the TRON network
- TRON white paper
- TRON integration documentation
- Sign and broadcast: the API workflow
- Transactions
- Wallet developer guide
- DApp integration with TronLink
- Exchange and custodial wallet integration
- Exchange wallet integration with the TRON network
- TRC-20 contract interaction
- TRC-20 protocol interface
- Tokenomics
- TRON vs Ethereum
Recommended
Frequently asked questions
TRON is its own layer-1 blockchain, with TRX as the native token used for fees. To accept payments you need a deposit address for each customer or order, a way to detect incoming transfers, and enough Bandwidth and Energy to move funds out. You can get detection and transfers from node APIs or from a wallet and webhook API.
A transaction is fully confirmed once at least 19 distinct active Super Representatives have produced blocks at or beyond its block, which typically takes about one minute, per TRON’s documentation. Credit customers from solidified blocks, and show an interim status while you wait.
A TRC-20 transfer is a smart-contract call, so it uses Energy on top of Bandwidth. If your account has no staked or delegated Energy, TRX is burned to cover it. Estimating Energy before sending, and staking or delegating for steady volume, keeps costs predictable.
TRON’s guidance for operators is not to store withdrawal keys in plaintext on an application server. Sign offline, in an HSM, or with a hardware wallet. A wallet API moves key storage to the provider, which then becomes part of your trust model.
Ready to build this yourself? Get your API key — 7-day trial, no card required — or see the Tron API for the full endpoint reference.